Setting up the development environment
To start developing BepInEx, we need three components:
- Latest .NET SDK
- A code editor or an integrated development environment (IDE)
- BepInEx installed and configured in the game
- BepInEx plugin templates
All these parts are next discussed in more detail
.NET SDK
Note
If you have .NET SDK (version 6 or newer) already installed, you can continue to picking an IDE.
.NET SDK is a software development kit (SDK) that allows compiling code written in C# and using different .NET libraries. As you may notice later, plugins use different .NET API versions and variations such as .NET Framework or .NET Standard. When it comes to plugin development, all those can be handled by the modern .NET SDK.
To install .NET SDK, do the following:
Head to .NET downloads page
Select the latest recommended .NET SDK for your OS:
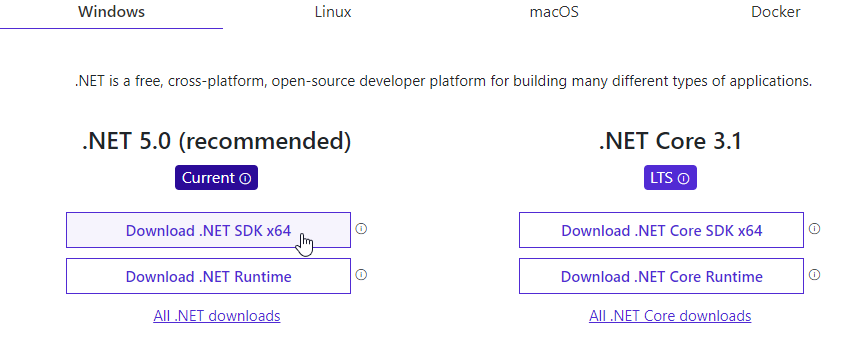
Download and run the installer according to your OS's instructions
You may need to restart your PC for the install to finalise.
Once you have installed .NET SDK, verify that it works by opening a command line prompt and running
dotnet --list-sdks
If you have installed .NET SDK correctly, the command should return at least one .NET SDK version and its location.
An example output is:
6.0.1 [C:\Program Files\dotnet\sdk]
Once you have at least one .NET SDK version installed, you can choose a code editor.
Picking an IDE
While plugins can be made with a simple text editor, it is recommended to use a proper editor for programming.
Different editors exist with varying level of integration with .NET building tools.
Proper IDEs provide more extensive features like code style suggestions, automatic completions and even debugging.
A list of some editors that are known to be usable for BepInEx plugin development:
- Visual Studio Community -- free, code completions, project management, debugging support
- JetBrains Rider -- paid, great code completion, code style suggestions, C# decompiler, crossplatform (Windows, macOS, Linux)
- Visual Studio Code -- free and lightweight, crossplatform (Windows, macOS, Linux), supports .NET and C# via plugins
Pick one of the code editors and ensure they work with C#.
Installing and configuring BepInEx
Next, make sure you have BepInEx installed in your game.
If you don't have yet, follow the installation guide.
Run the game with BepInEx at least once in order to generate configuration files and any additional libraries.
To make debugging easier, it is useful to enable the BepInEx console.
To do so, go to BepInEx/config folder and open BepInEx.cfg.
Find the following configuration section/value and edit it as follows:
[Logging.Console]

## Enables showing a console for log output.
# Setting type: Boolean
# Default value: false
Enabled = true
Installing BepInEx plugin templates
BepInEx provides helper templates to start off with plugin development.
We will be using them to make our plugins.
To install the template, run the following command:
dotnet new install BepInEx.Templates::2.0.0-be.4 --nuget-source https://nuget.bepinex.dev/v3/index.json
If the install is successful, you should see a listing of all .NET project templates. Among them should be the following BepInEx templates:
Template Name                    Short Name               Language  Tags
-------------------------------  -----------------------  --------  ------------------------------------------
BepInEx 5 Plugin                 bepinex5plugin           [C#]      BepInEx/BepInEx 5/Plugin
BepInEx 6 .NET Core Plugin       bep6plugin_coreclr       [C#]      BepInEx/BepInEx 6/Plugin/CoreCLR/.NET Core
BepInEx 6 .NET Framework Plugin  bep6plugin_netfx         [C#]      BepInEx/BepInEx 6/Plugin/.NET Framework
BepInEx 6 Unity Il2Cpp Plugin    bep6plugin_unity_il2cpp  [C#]      BepInEx/BepInEx 6/Plugin/Unity/Il2Cpp
BepInEx 6 Unity Mono Plugin      bep6plugin_unity_mono    [C#]      BepInEx/BepInEx 6/Plugin/Unity/Mono
Summary
In this part, we installed .NET SDK, a code editor, BepInEx and BepInEx plugin templates. With all components set up, creating a new plugin is a fairly simple process.
Next: Writing a basic plugin